





Why Use a Pipe Coupling Clamp?
A Pipe Coupling Clamp helps hold two pipe ends together, often supporting a coupling that joins separate sections. In practical terms, it can help limit movement, maintain alignment, and support a leak-resistant connection when the parts are correctly matched. Picture two pipe ends meeting beneath a clamp in a damp utility room: a small shift can matter. The clamp is not a cure-all. Pipe material, diameter, pressure, temperature, and the coupling design all affect whether a particular setup is suitable.
This article explores why these clamps are used, how they work, and what to consider before choosing one. It also looks at inspection and installation basics, including checking for damaged pipe surfaces, confirming dimensions, and tightening hardware according to the manufacturer’s instructions. Small details count. A clamp that is too loose may allow movement; one tightened improperly may damage components or fail to seat as intended. That sounds straightforward, but field conditions are rarely perfect. Access may be cramped, and older pipes may show wear that is easy to miss. A careful assessment matters more than assuming every clamp fits every joint. Where the application is critical or specifications are unclear, consult product documentation or a qualified piping professional. The aim is a secure, compatible connection—not simply a tight-looking one.
What Is a Pipe Coupling Clamp?
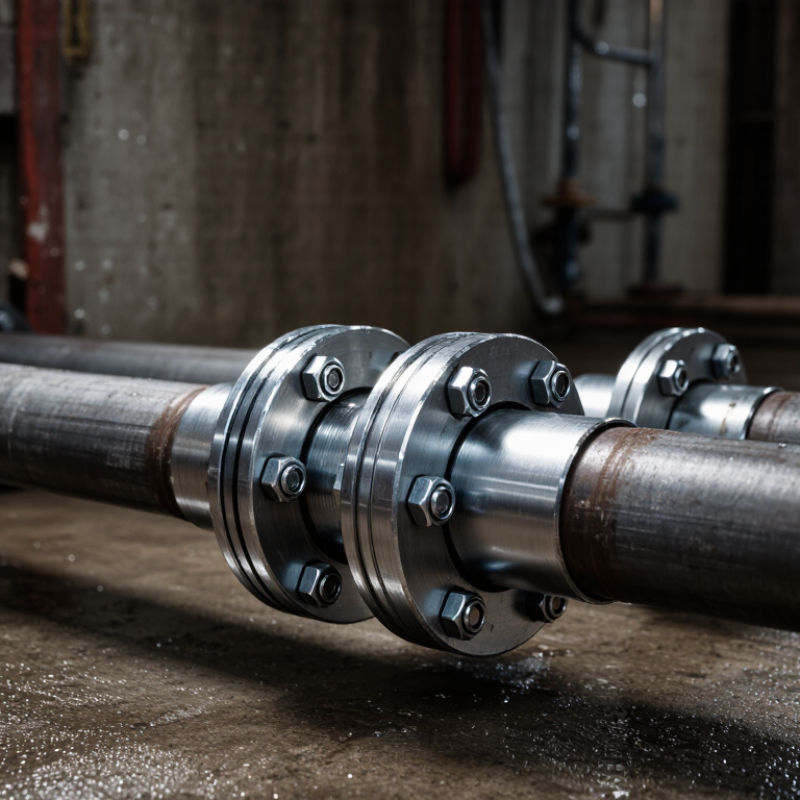
A pipe coupling clamp is a metal assembly that joins pipe ends or seals damage around a pipe. Many designs use a curved housing, bolts, and a gasket that presses against the pipe surface. Tightening the bolts creates a firm, even seal. Some clamps connect two pipe sections; others are made specifically for leak repair. The terms can overlap, so check the product’s intended use. That distinction is easy to miss. Small part. Real consequences.
On site, a clamp can be useful where replacing a short pipe section would require more cutting, access, or downtime. The American Society of Civil Engineers’ 2021 Report Card for America’s Infrastructure estimated that the United States has about 2.2 million miles of drinking-water pipes and assigned the sector a C− grade. These figures describe system-wide infrastructure needs, not the performance of any individual clamp. A clamp is one repair or connection option, not a cure for aging networks.
Before installation, confirm the pipe’s outside diameter, material, operating pressure, and fluid compatibility with the clamp specifications. Check that the gasket sits flat and that bolts are tightened evenly. A clamp that looks secure may still leak if the pipe is badly corroded, out of round, or outside the product’s rated conditions. In practice, careful measurement matters more than force. Some details are easy to overlook.
| Topic | What It Means | Why It Matters |
|---|---|---|
| What it is | A pipe coupling clamp is the clamping or housing component used in some mechanical pipe couplings to hold the pipe ends and coupling parts together. | It creates a mechanical connection without requiring the pipe ends to be joined by welding. |
| How it works | Depending on the coupling design, the clamp or housing engages the pipe ends, while a gasket may seal the joint and fasteners secure the assembly. | The pipe, coupling, gasket, and fasteners work as a system; the clamp alone is not necessarily the sealing element. |
| Typical applications | Mechanical couplings are used in suitable piping systems for water, fire-protection, HVAC, and industrial services. | Application suitability depends on the coupling design, pipe material, fluid, operating conditions, and applicable requirements. |
| Installation and maintenance | Install the coupling according to its instructions. Check pipe-end preparation, gasket position, fastener tightening, and joint alignment as applicable. | Correct assembly helps reduce the risk of leaks, joint separation, and damage to the pipe or coupling. |
| Movement and alignment | Some coupling designs allow limited angular deflection or axial movement; others are intended to provide a more rigid connection. | Do not assume a coupling permits movement. Confirm its intended behavior and provide separate pipe supports where required. |
| Pressure and temperature limits | Limits vary by coupling model, pipe size and material, gasket, fluid, and installation conditions. | Use the ratings and compatibility information specified for the particular coupling system rather than relying on a general value. |
| Selection checklist | Confirm pipe outside diameter, pipe material, coupling type, gasket compatibility, service conditions, and required approvals. | Matching the components to the piping system helps ensure a suitable and dependable connection. |
How Does a Pipe Coupling Clamp Secure a Joint?
Why Use a Pipe Coupling Clamp?
How Does a Pipe Coupling Clamp Secure a Joint?
A pipe coupling clamp holds two pipe ends together inside a shared outer housing. Many designs include a gasket that sits between the pipe surface and the clamp. When the bolts are tightened, the housing compresses the gasket around both ends. That pressure helps seal the joint and limits movement. A snug fit matters.
Good installation starts with clean, undamaged pipe ends. Dirt, deep scratches, or uneven alignment can interfere with the gasket’s contact. The pipe ends should sit at the spacing specified for the coupling. Then tighten the bolts evenly, rather than fully tightening one side first. This helps keep pressure balanced around the joint. Small details matter here.
A clamp can help resist separation, but its capacity depends on its design, pipe material, installation, and operating conditions. Not every coupling is intended to handle strong axial forces or provide all required pipe restraint. Check the product’s instructions and use the specified tightening method. After installation, inspect the joint for leaks and signs of shifting. I would not assume a dry first check guarantees long-term performance; vibration and temperature changes can alter a connection over time. Regular inspection is sensible.
Which Pipe Problems Can a Coupling Clamp Address?
Why Use a Pipe Coupling Clamp?
Which Pipe Problems Can a Coupling Clamp Address?
A pipe coupling clamp can help with localized damage that does not require replacing a long pipe section. Depending on its design, it may seal pinhole leaks, narrow cracks, or small areas of corrosion. Some clamps can also reconnect separated pipe ends when the gap and alignment fall within the product’s limits. A damp ring around a pipe is often the first visible clue.
Not every leak is a clamp problem. Extensive corrosion, a badly crushed pipe, or damage close to a fitting may need a different repair. Pipe material, outside diameter, operating pressure, and fluid temperature all matter. It is tempting to treat a clamp as a universal fix, but that assumption can lead to repeat leaks. Check the specified service conditions and inspect the pipe beneath the repair area.
For a reliable repair, isolate and depressurize the line before installation when the system allows it. Clean the contact surface, position the gasket evenly, and tighten fasteners in the recommended sequence and range. Small details matter. If the pipe keeps shifting or the leak returns, investigate the underlying cause rather than tightening harder. A qualified technician can assess whether a clamp is suitable or the damaged section needs replacement.
Why Use a Pipe Coupling Clamp?
Typical coupling layouts for common pipe problems
A coupling joins compatible pipe ends; replacing a short damaged section typically takes two couplings, one at each end. A leaking pipe joint may be reconnected with one coupling if it is rated for the pipe material, dimensions, pressure, and service conditions. A leak through the pipe wall usually calls for a suitable repair clamp, not a standard coupling.
What Benefits Does a Pipe Coupling Clamp Provide?
Why Use a Pipe Coupling Clamp?
What Benefits Does a Pipe Coupling Clamp Provide?
A pipe coupling clamp joins two pipe ends while helping keep them aligned. Many designs use a gasket to create a seal and a metal housing to hold the connection in place. This can make repairs quicker than replacing a longer pipe section, especially where access is tight. It also reduces the need to move nearby pipes during installation. That matters.
The right clamp can accommodate small differences in pipe-end position, but its limits depend on the design. Check that the clamp matches the pipe diameter, material, service temperature, and operating pressure. A reliable fit starts with clean, sound pipe ends. Corrosion, dents, or uneven cuts may affect sealing and retention.
Tips: Measure both pipes before choosing a coupling. Remove dirt and loose scale, then check that the gasket sits evenly. Tighten fasteners to the specified torque; overtightening can damage parts, while insufficient tightening may allow leakage. Inspect the connection after installation and again during routine maintenance. A clamp is not a cure for a badly damaged pipe, and the first installation can be less straightforward than expected.
How to Select and Install the Right Clamp?
Choosing a pipe coupling clamp starts with the pipe, not the clamp. Measure the outside diameter at a clean, round section; rust, paint, or ovality can distort the reading. Check the pipe material and the working pressure and temperature. The clamp body and sealing gasket must suit those conditions.
Also consider what flows through the line and whether moisture, chemicals, or outdoor exposure could affect the materials. A clamp that fits by diameter alone may still be the wrong choice. Small details matter.
Before installation, isolate and fully depressurize the line. Clean the pipe surface, then inspect it for deep corrosion, cracks, or dents. A clamp cannot reliably compensate for serious pipe damage.
Center the gasket over the defect or joint, and keep it flat without twisting. Position the clamp evenly around the pipe. Tighten the fasteners gradually and in an alternating pattern, following the specified torque if one is provided.
Too little pressure may allow leakage; too much can deform the pipe or damage the seal. Check alignment and the gasket edges before restoring service. Then inspect for leaks under the system’s normal operating conditions.
If the clamp shifts or seepage remains, stop and reassess the fit. Rushing this step is tempting, but it rarely saves time.
